Tuesday, November 25, 2014

HAPPY THANKSGIVING!

        Thanksgiving is one of my favorite holidays and it’s just around the corner. I’m super excited! For the past few years, my family has been following the same tradition for the Thanksgiving Weekend.
         First, my family serves the homeless and less fortunate at the Knights of Columbus on Thanksgiving Day. Each year, the Knights serve more than 1,500 meals. I really enjoy being able to participate in that. Just seeing the happiness they get from getting to have a nice, big Thanksgiving Dinner makes me so happy. That lasts from about 2 – 5 PM. After we serve, we also get to have Thanksgiving Dinner there.
         Then, we drive up to Connecticut on Thanksgiving Night. We get to spend the weekend with our family up there. It’s really nice to be able to travel there, even though it’s just for the weekend. I love being able to see the whole family because, since they live far away, it doesn’t happen as often as I’d like it to, mostly just for the holidays. So I'll soak up every minute of it!! :) 
I hope you all have an amazing Thanksgiving and safe travels!!
Kendra <3

Monday, November 24, 2014

How To Make Puppy Chow

Puppy Chow is a delicious little snack! It's easy to make and doesn't involve a lot of work, and today I'm going to teach you how to make it.

What you'll need:
Chocolate Chips
Peanut Butter
Rice Chex Cereal
Powdered Sugar
Spoon
Bowl
Zip-Lock Bag
Measuring Cup

1) For ease, first gather everything you will need in order to make this snack.


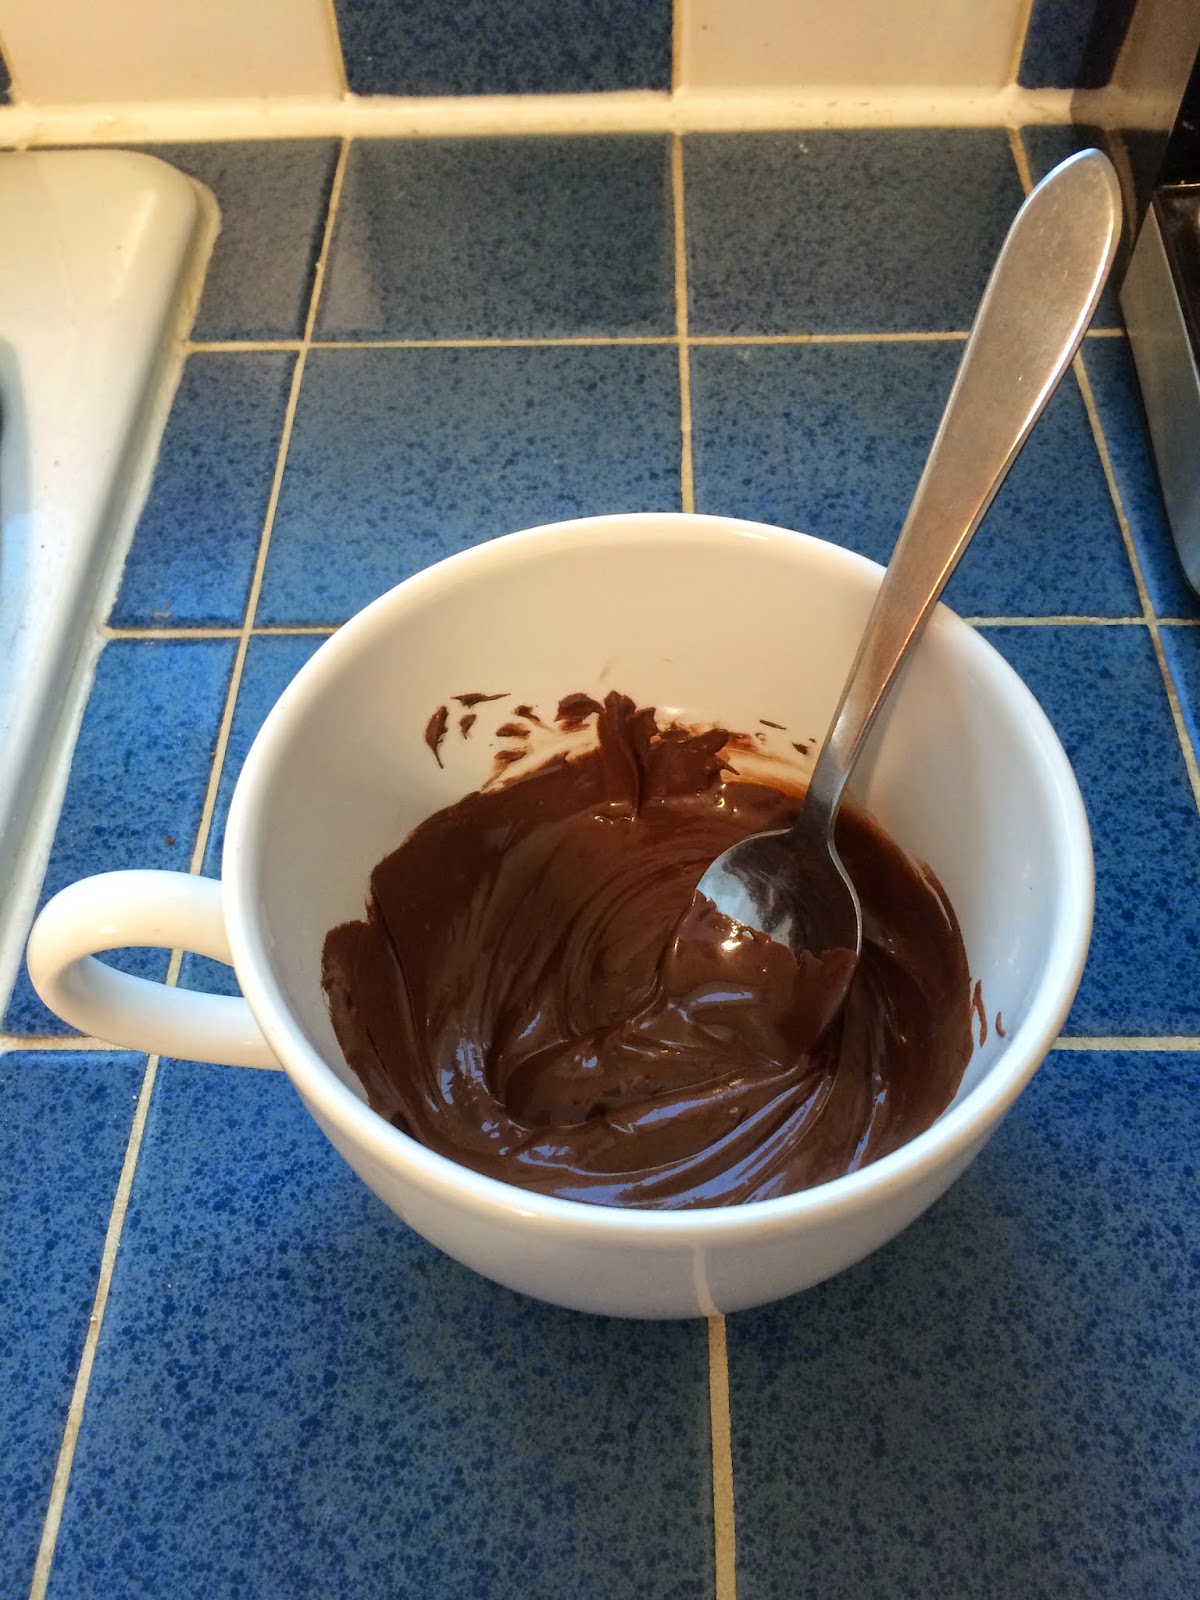
2) Measure 1/2 cup of chocolate chips into a microwave safe bowl. 


Heat for thirty seconds at a time (stirring after each heating) or until melted completely.


3) Measure 1/4 cup of peanut butter and mix it into the now melted chocolate chips until thoroughly blended.


4) Pour 4 1/2 cups of Chex Cereal into a bowl. 


Add the peanut butter chocolate mix and stir with either a spoon or your hands until the cereal is fully coated.


5) Put 3/4 cups of powdered sugar and the coated cereal into a zip lock bag, close it, and shake until the cereal is covered in powdered sugar.


6. Once it's all coated in powdered sugar, you're done. You can keep it stored in the zip lock bag and serve in a small bowl, if you wish. Enjoy!


I hope you guys like this recipe, I LOVE IT! Let me know what you think.
Check back soon,
Kendra <3

Sunday, November 23, 2014

Hair Growth Tips

Today, I'm going to talk about hair....
At least for girls, I know hair can be a pretty valuable thing. I sure think of mine that way! One thing that many girls want is for their hair to be long. Unfortunately, this process can take a while. For those of us that are impatient, there are a few things that have been studied and are supposedly able to help your hair grow healthier and faster. Below are some of the tips I've learned...

1. Stay Hydrated -- When you are hydrated, your body regulates it's circulatory system, which then feeds your follicles, which then helps your hair grow. Without enough water, your roots can become harsh and sometimes stop hair growth all together. So, by all means, drink water! It's cheap, it's easy, and it's healthy.

2. Avoid Everyday Washing -- Washing your hair everyday takes the natural oils out of your hair. Also, the chemicals in shampoo and conditioner can hurt your hair. Instead, try washing it every other day, or every three days. On days when you aren't washing your hair, try wearing a shower cap or keeping your hair out of the water during your showers, as to not rinse out your natural oils. You can also try some sort of "no-poo". So, give your hair a little break by not washing it everyday.

3. Avoid Heat -- This one is definitely a hard one. If you style your hair, it's likely that you use some heat products. Whether you're using your hair dryer, a straightener, curling iron, flat iron, etc. there can be a lot of heat involved. But, heat is very damaging to your hair. You can always try looking up some no heat tutorials for hairstyles you'd regularly achieve with heat. If you do decide to use heat, try using a heat protector on your hair first

4. Food -- Some foods have been said to help hair growth. Some of the more well-known foods are: eggs, avocado, nuts, fish, meat, and oysters.

The internet is crawling with many different tips to help you with your hair growth issues. What I've listed is just a handful of things that I do to try to keep my hair healthy and help it to grow faster.
I hope this was helpful!
Check back soon,
Kendra <3

Thursday, November 20, 2014

How To Make The Best Chicken Salad

Today, because we are out of grapes at my house, right when I was craving my mom's chicken salad, I'm going to teach you how to make The Best Chicken Salad! Just follow these steps...

1. Gather all your ingredients so you don't have to search for anything while you're trying to make your chicken salad. 

2. Take your can of chicken, open it, and dump it into your bowl. Then use a fork to shred the chicken.

3. Cut your grapes and celery. You want to aim for bite sized pieces of celery, and I normally cut the grapes into quarters.

4. Mix a table spoon of mayonnaise, a handful of cheese, a few handfuls of grapes, a few handfuls of celery, a few pinches of salt, and a few pinches of pepper into your shredded chicken. 

5. Once you've stirred your chicken salad, taste it. If it takes like a bite of heaven, then you're done. If it's not quite there yet, it probably needs more grapes - grapes are key ;)  Enjoy!

What you'll need:
Canned Chicken
Mayonnaise
Celery
Salt
Pepper
Grapes
Cheese
Bowl
Fork
Spoon

I hope you enjoy your chicken salad!
Check back soon,
Kendra <3

Wednesday, November 19, 2014

Fishtail Braid Pictorial

Today's pictorial is for a Fishtail Braid. While it's easy with some practice, it does take a bit of time if you want it to look neat and "finished". 

1. Brush your hair so it's easy to work with.


2. This step is optional -- If this is your first time attempting this hair style it can be a bit hard to hold all the hair together. If this is the case for you, use a small rubber band to loosely hold your hair together at the base. We will cut it out when we're finished to give it a more sleek look.


 3. Hair tie or no hair tie, separate your hair into two equal sections.


 4. Separate a very small piece of hair from the outermost part of your right section (keep in mind - the smaller pieces you use for this step, the neater and more detailed your fishtail will look).


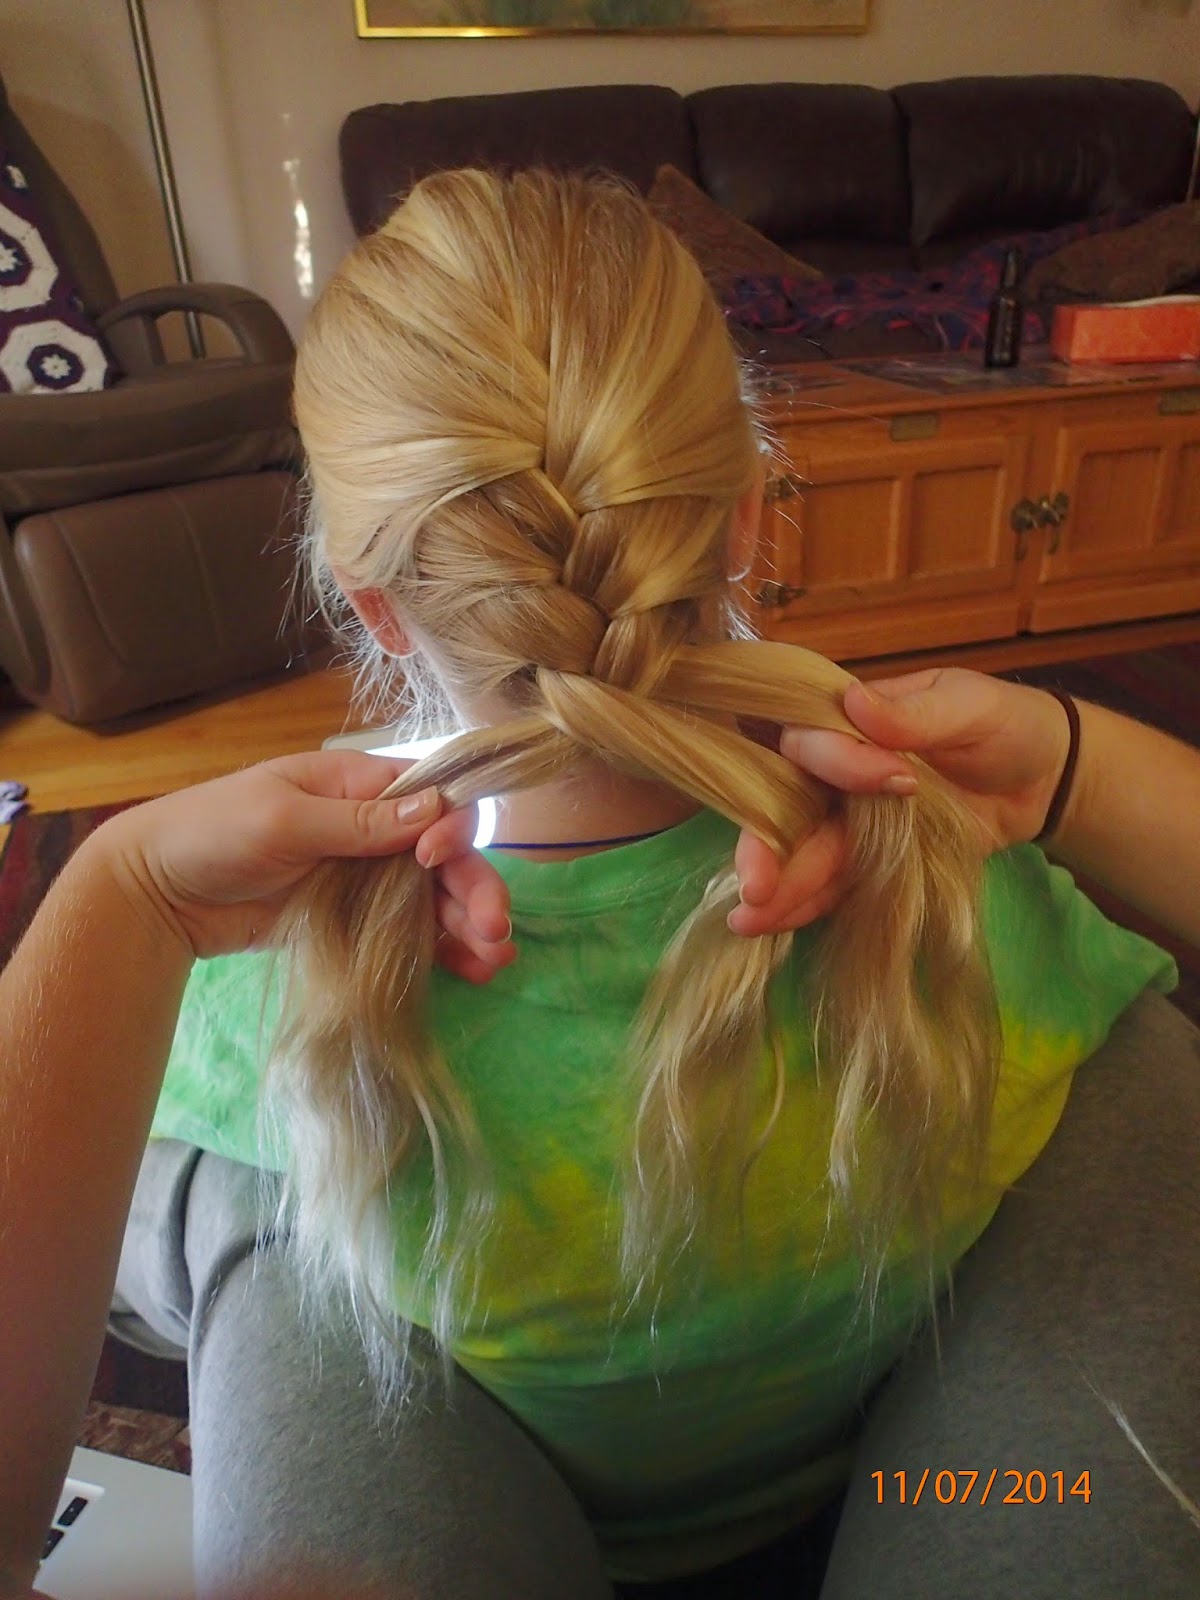
 Cross that small piece of hair over the right section and join it with the left section (As show below).


 5. As we did before, separate a very small piece of hair from the outermost part of your left section


and cross that small piece of hair over the left section and into the right section (As shown below).


 6. Continue to do the same thing until you reach the ends of your hair. (DO NOT restart if you think your fishtail braid is not looking neat. Even though it may seem that way, once you secure your braid, it will loosen up and all fall into place)


 7. Once you reach your ends, the sections will become small enough that you'll end it with a regular braid.


8. Tie your braid off with a little elastic band.


9. Go back to the top of your braid and carefully cut out that small rubber band we used at the beginning. Then, lightly pull on your braid to loosen it up.


10. Once you've cut out the rubber band and loosened your braid, you're done. Enjoy!


Kendra <3

Tuesday, November 18, 2014

Operation Christmas Child


This year, my family participated in something called Operation Christmas Child. Run by Samaritan's Purse, Operation Christmas Child collects millions of shoe boxes full of Christmas gifts and gives them to the less fortunate. Since 1993, when the operation started, they have filled and shipped over 100 million shoe boxes.
Although you do not know where you're sending your shoe box, you can decide whether you buy for a girl or a boy. You can also pick an age category for your donation.
This year my family filled a shoe box for a girl from the ages 5 - 9. We went to Five Below and bought as much stuff as we could stuff into our shoe box. Some of those items include: School supplies, stuffed animals, toys, jewelry, note pads, coloring books, and hair accessories. We also put a little note including a picture of our family.
Another thing you have the option of doing is putting a label on your shoe box so when it gets shipped out, you know where it's going to end up. We did that as well.
I think that Operation Christmas Child is a remarkable program. The fact that enough people donate shoe boxes that the company sends to 150 countries is amazing. I hope that we continue to donate each year and find even more ways we can help out.

Monday, November 17, 2014

We Are Family

Something that has shaped my life in a huge way is my swim team. We are called the “Holy Mackerels.” We aren’t one of those super competitive swim teams and that’s one of the best parts.
            We are all very close. We are actually quite close to family during the summer. By family, I’m not implying that we are all kind to each other and we love each other. I’m implying, we tease each other; we fool around; sometimes we fight; but we always fix it. We act like a real family. Everyone on the team, new or old, is welcomed into our family.
            The younger kids on the team “look-up” to us older kids. We have to be there for them. Whether it’s putting their cap on, or teaching them a stroke, they need us, and we are there.
             Swimmers can participate on the team from ages five to eighteen. Once they are nineteen, they have officially graduated. My two older sisters have graduated from the swim team already. One of them is now a coach. 
            One of the elements that bring our team together even more is that we have shared many kinds of experiences. We have lost people together, we have found new people together, we have achieved many goals, and so much more. Knowing that, when you need a shoulder to cry on or a helping-hand, you will have 250 options is an amazing feeling. We are always there for each other. We are family.


Sunday, November 16, 2014

Rope Braid Pictorial


1. Brush out all hair to ensure there are no knots.


2. Pull all of your hair into a ponytail.


3. Split your ponytail into two equal sections (as shown below).


4. Take the right section and tightly twist it to the right (as shown below).


Then take the left section and tightly twist it in the same direction, which, in this case, means to the right (as shown below).


5. Twist the two sections around each other in the opposite direction of their individual twists. In this case, to the left (as shown below).


6. Continue to twist in the same fashion until you reach the ends of your hair.


7. Tie it off with a rubber band and you're finished!


Thursday, November 13, 2014

Overcoming Challenges and Learning Lessons

I have been playing many sports for a long time. I have had a number of really great coaches and teammates and have never had a problem with any of them. Until recently, that is.
            A couple of weeks ago, I was asked to play in an important tournament. I was asked last year as well, but decided against going due to prior commitments. But because they really seemed to need me this year, and I didn’t have any other conflicts, I agreed to play. I had three practices before the tournament. The first practice was run by a coach who wasn’t the regular. I knew him prior to that practice and he’s very nice and good at what he does. The other two practices were with the actual head coach of the team. At these practices, it quickly became clear that, for the first time in my life, I might have a problem. The coach was very negative. He yelled about every little mistake one of us made, and gave almost no positive feedback throughout the practice. It made me very uncomfortable. Not only was I upset when he yelled at me, but actually moreso when he yelled at my teammates.
            After the last practice before the tournament, I was so upset about how it was going that my parents and I drafted an email telling the head of the program that I wouldn’t be playing because of the way our team’s coach acted.
            That night, my dad suggested that rather than send the email right away, I instead “sleep on it” and make my final decision in the morning—so as not to let my emotions, at the time, influence me too much. When we woke up, we discussed our options. We decided that the best thing to do was edit the draft email to indicate that I was thinking of not playing in the tournament, to see if he had anything to say that would help.
            Later that day, after we sent the email, the head of the program called us and told us that he really wanted me to play. Not only because he thought I would be a great asset to the team, but also because it was a very exciting and different opportunity that I wouldn’t be able to have again. The thing that persuaded me most was probably when he said that he would personally be there to coach as well and be able to “shield” the other girls and me, if our coach was getting too into the games. I knew him better than I knew our coach, and I knew that he would, as he said, step in if it was necessary.
            I was still a little worried, but I decided that I would play. My reasons being: the head of the program would now be there to keep things calm; I love the sport and knew it would be a very special, rare experience; and the girls on my team, and my coach, needed me and were counting on me.
            Turns out that there wasn’t any excessive negativity or yelling, only the appropriate amount coming from a coach. I did very well and had so much fun. Our team won the entire tournament, being the first team to EVER win from our town, and now my team is going out of state for the National Championship!
            I’m so thankful that my parents, and the program head, persuaded me to go and at least try. After experiencing the tournament, I definitely would not go back and change my decision to play. On top of a great tournament, I learned an even greater life lesson.

Wednesday, November 12, 2014

Helpful Headache Relievers

I, personally, get terrible headaches, and quite often. There are some natural home remedies that can work better than certain medicines. Hopefully, if you suffer with headaches as well, some of these tips will help you.
  1. Try to find a source -- Start to keep a food diary. Sometimes headaches can be caused by an allergy or certain foods that your body doesn't respond to well. Therefore, the easiest fix can be to find out if there is a food that is causing your headaches.
  2. Oils and Scents -- Certain oils and scents have been proven to alleviate headache pain. Lavender oil, peppermint oil, basil oil, rosemary, chamomile, ginger, and more.
  3. Pressure Points -- There are many common points on your body used to get rid of headaches. Keep in mind not all of them will work on everyone, so try some out and figure out what works best for you. A couple examples are: 1 - Gently rub both temples simultaneously in a counter-clockwise motion. 2 - Use your index fingers to gently massage the inner edge of your eyebrows, above the bridge of your nose on both sides.
  4. Quiet, Dark Environment -- Laying down in a room with little light and little noise can help your mind to rest and get rid of the headache. 
  5. Cold Pack -- Place either an ice pack or cold cloth on your eyes or forehead.
  6. Food -- There are certain foods known to keep headaches at a minimum. 1 - Make sure you're getting your regular amount of vitamins, protein, iron, etc. 2 - Small doses of caffeine -- whether it's a cup of tea, coffee, or an apple, when suffering from a headache a little caffeine is known to help clear it up. 3 - Bananas -- The high levels of magnesium in bananas can be helpful to alleviate headache pain... There are many other options in the food department worth looking into.
I do hope that some of these quick tips helped you in finding your relief from headaches!
Kendra <3

Tuesday, November 11, 2014

Sports In My Life


           Courts, fields, and pools: those places seem to be like second homes to me. Sports are such a huge part of my life and have been for ten or eleven years.

            I play soccer, flag football, basketball; I dance and I swim. As one may guess, some days, it feels as if I am running from one sporting event to another. I don’t normally have much of a break, and even though I’m used to moving around all the time, I still find myself super sore sometimes. But being busy and sore is not important when I am able to do so much of what I love.

            When I first started playing on sports teams, it was simple, no complications. Once I became a freshman in high school, one aspect became a little bit aggravating. Being homeschooled, I couldn’t play on any high school teams. Instead, I had to play through the county. Not to imply that playing through the county isn’t good enough, but not being able to do something made me want to do it more.

            One great thing about playing through the county for soccer and basketball is that I have been able to play with the same team, teammates, and coaches since I started. They are a really great, talented group of girls and I have become considerably close to them in the past eight years.

            I only started playing flag football last year, even though I have been playing football with my neighbor for most of my life. Unfortunately, I started as an eighth grader. Because you can only play until freshman year, I could only play for one more year. I do wish that I had found out about playing flag football earlier, so I could have played longer.

            Dancing has been a part of my life since the beginning. Originally, I wanted to start taking dance classes because of my cousin. She wasn’t able to dance for a long time afterwards. During that time, I was even more encouraged to dance. Even though she couldn’t dance herself, she always seemed to enjoy watching me dance and knowing that I cherished dance, just like her. I loved dance so much, and started to become really great at it. Excited, I continued.

            Similar to dance, I have always been in love with swimming. I have two older sisters who have always swum. Wanting to be like them, I became a swimmer as well. Because we also have a pool in our basement, not being able to swim wasn’t really an option. We are members at a pool in the summer that’s a few blocks away from our house. We have been going there since my oldest sister, Cassie, was a cute, little baby. We joined the swim team there, and have been swimming with them since then. Even though I love swimming, my team has made me love it even more.

            I do plan on continuing to play sports, because having been engaged in sports for such a long time, I, honestly, could not imagine my life without them.

Monday, November 10, 2014

Three Strand French Braid Pictorial


1. Brush out all hair to assure there are no knots and part your hair regularly.


2. Evenly part a section of hair, starting just above the ears, all the way across the back of your head.


3. Split that section of hair into three equal parts. We'll name those parts "1", "2", and "3".


4. The first stitch of our french braid is just a regular braid. Take part 1 and cross it over part 2. Now you should have, in order, parts 2, 1, 3 (as shown below). 


 We will finish that stitch of our regular braid, by crossing 3 over 1. Your three parts should now be in the order: 2, 3, 1 (as shown below).


 5. Now we add the "french" to our "braid". This time, you will take a small section of your hair and add it to section 2.


 Then continue by crossing section 2, including the added hair, over section 3. The order is now 3, 2, 1 (As seen below). 


Then do the same thing on the other side of your head by adding a piece of hair to section 1 and crossing it over section 2. 


 The new order being 3, 1, 2. 


6. Once you have added in all of your hair, you will finish it off with a regular braid. (If you aren't familiar with how to braid, see my blog for another pictorial.)


7. Braid the hair down as far as you can. Then, secure with an elastic band and you're done!


Kendra <3


Friday, November 7, 2014

Three Strand Braid Pictorial


1. Brush out all knots and part hair regularly.


2. Pull back all of your hair into your hand as if you were going to make a low ponytail.


3. Separate that hair into three equal parts. Those parts will be called "1", "2", and "3".


 4. Take part 1 and cross it over part 2. Your new order should be 2, 1, 3 (As shown below). 


 Now, take section 3 and cross it over section 1. New order: 2, 3, 1 (As shown below).


 5. Continue step 4 until you reach the bottom of your hair. 


 6. Once you reach the ends, secure with an elastic band, and you're done!


Hope you all enjoyed today's post! 
Kendra <3